Most Comprehensive Finacle Wiki and commands on the web

A complete illustrative and exclusive guide of Finacle Commands

Finacle Commands , Your knowledge Partner

Get commands over finacle..

Monday, February 25, 2013

DONT's in Finacle

Dear Readers , we are going to post the last part related to in our inventory series which is  about the Various Reports in Inventory  Maintenance, Splitting and Merging of Inventories in Finacle . In the mean time, we present the Basic things which you should n't do while working in Finacle. This post is shared by one of our Reader from UCO Bank, India

DON'Ts in Finacle: 
  • Do not try to login into the system with wrong Userid / Password more than 3 times continuously otherwise your User Profile will be deleted , which requires Undelete in menu HUPM/ UPM in finacle and it may requires modification if you forget the current Password.
  • Do not post the system cash leg in cash transactions  of Finacle , without confirming the actual amount of cash receipt / payment.
  • Do not post the system generated cash transaction leg if the user is not designated as either Head Teller or Teller in cash department.
  • Do not put manual debit transactions in Term Deposit a/c s for closure / part withdrawal of amount. Close Term Deposit with menu CAAC so that if it is prpremature , system can collect charges for the Same.
  •  Do not issue chequebooks manually to the customers without entering into the system.
  •  Do not issue pay order / demand draft to the customer without being issued and printed in the system and verify the instrument number with the system  generated  number before issuance.
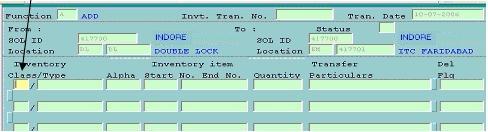
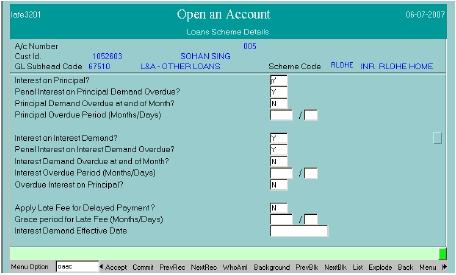
  •  Do not open a/c s in wrong scheme codes / GL Sub head combination for Term deposits and Loan accounts in particular. Caution should be observed while verifying such accounts. Though you can later change the Scheme Code using ACXFRSC and change the GL Subhead code by TACBSH
  •  Do not debit Manual Interest Paid A/c 
  •  Do not put A/c preferential interest (CR) during account opening except for staff / Senior Citizen or Bulk deposits with incentive rate of interest. Caution should be observed by the Authorizer while verifying such accounts   .
  •  Do not delete the Tax slab in customer id & put TDS01 /15H when the customer submits 15H / 15G. But update the TDS exemption date / date of submission of 15H / 15 G & TDS remark field as 15 H / 15 G only.TDS slab should remain as usual like TDS02/TDS03/TDS04/TDS05 as the case may be.
  • Do not verify any Loan against deposit a/c/ Cash Credit against deposit a/c if the absolute interest rate as applicable is not mentioned in the A/c preferential debit field & the drawing power indicator is not mentioned as ‘D’ in Account limits tab.
  • Do not renew the Cash credit limit/Drawing power with back date in HACLHM / ACLHM menu. Always put the BOD date .
  • Do not open Cash credit a/c s under hypothecation of stocks without drawing power indicator as ‘D’. Caution should be observed while verifying such accounts.
  • Do not use TV menu for mass verification of transaction entries without referring to the individual vouchers except for cash posting transactions i.e if the Transactions are in Entry State , never use TV menu for mass Verification in finacle.
  • Do not authorize overdrawing(TOD) in SB / CA / CC accounts with TOD level interest flag as ‘Y’ and NO interest amount specified in Normal interest / Penal interest field. The Branch Head while verifying such transactions should observe caution.
  • Do not enter any transactions into the system without any voucher being signed by the competent authority like Working Expenses a/c / Interest paid on Deposits a/c vouchers in particular.
  • Do not enter value dated transactions in the accounts specifically Cash credit and Loan accounts in particular. Caution should be observed while verifying such transactions.
  • Do not put partial adjustment entries in Sundry Creditors / Sundry Debtors / IBCN Paid / Inter CBS fund transfer parking account/ Inter CBS collection parking a/c / Intersolgen Parking a/c & Treasury Adjustment a/c. Caution should be observed while posting such transactions.
  • Do not post the debit transactions in Suspense a/cs like Bills Realised / Tax Deduction at source / Margin on LC / BG & Tax Collection a/c s if such a/c s are not in credit balance.
  • Do not close the cash daily without taking the Teller wise cash Receipt / Payment report from system.
  • Do not make TM transactions for purchase of Cheques / Bills & realization of Bills / Cheques without using Bills module (CUSTFBM / FBM)
  • Do not make disbursement in Loan accounts through TM menu, but use HLADISB/LADISB  menu only for recovery of processing charges by the system.
  • Do not put Recalled Flag as “Y” in Drawing Power under ACLHM while opening the account, as it will start charging Penal Interest from the day of account opening itself.

Always remember the above mentioned Points and if you have any doubts , please refer to your Bank Manual / IT Team / Data Center for further clarification

Do drop your comments and feedback.  

Wednesday, February 20, 2013

Movement of Inventory in Finacle from DL-DL ( Double Lock ) to EM-EM (Employees Location)

We have already discussed the Process of Movement of Inventory from One Location to another in finacle  using IMAUM and IMC menu. In our Previous Post we have mentioned about the Procedure for Movement of Inventory from External Location EXT - ZZ to DL - DL (Dual Lock). Let discuss the Next step i.e Movement from DL - DL (Double Lock) to EM-EM ( Employees Location ).

Movement of Inventory from Double Lock  to Employees Location

Finacle Menu option :  IMC
  • Enter A in the Function field and Press F4, the cursor will appear at the field From Location in the next block.
  • Enter DL in the first field & DL in the next field (if the inventory is being moved from Double Lock to Employee) that means inventory is being moved from Double lock to Employee for his further action. & press Tab or ENTER Key twice, the cursor will appear at To Location field.

  • Enter EM in the first field and Employee’s Employee ID (i.e. generally PF No.) of the user to whom the inventory is being moved/issued, in the To Location field, as shown in the above screen.   This Employee ID /PF No.  can also be selected from the list which is available by pressing F2. Press  F4,  the  Cursor  will  appear  in  the  next  block  at  the  Inventory Class/Type field.
  •  Enter Inventory Class like CHQ for Cheque Book, CO for Cash Order, DDS for Demand Draft, SI for Stock Invest, TDR for Term Deposit Receipt, TPO for TPOs etc.  The list of Inventory Class can be seen by press F2 which are shown as below: 
  • The type of inventory will be automatically be selected if the class is selected from the list by pressing Shift and F4, otherwise enter the type of inventory and press Tab or Enter key to go on to the next field.
  • Alpha :  Enter Alpha Series of inventory e.g. BCZ  & press Tab or Enter key to go on to the next field.
  • Start No :  Enter Start No. of inventory e.g. the start no. is 100001.  Press Tab to go on to the next field.
  • End. No :  enter the end no. of inventory   e.g. e.g. 100100 &   press Down Arrow  Key the  system  will  automatically  display  the  quantity  which  is  being moved and the cursor will appear on the next line as shown below:   
 
Finally, press F10 to commit and save the record and as a result , The system shall generate an Inventory Transaction No. like 162006 (as shown below).  
Please note this transaction no and get verified this inventory transaction by a different Employee through the menu option IMC

Verification  
To  verify  this  inventory  movement,  enter menu  option  IMC.    Enter Function as V for verification, enter inventory transaction id and Press F4,  system  will  display  the  inventory  record  moved  to  the  employee location.  Press F4, the following screen will appear:
Here, you are required to enter password of Authorized Officials who can operate Double Lock and  the authorized officials have to enter their passwords in the respective fields.  Apart  from  entering  password  of  two Double Lock Authorizers, Password of inventory recipient’s user will also to be entered
 
On accepting password the flag of password will automatically convert to 
Y from N as shown above. Finally Press F10 to commit and the system will give the message Record Verified as shown below.
Note: 
  • In some Banks practice is  to allocate the Inventories directly from ZZ-EXT to DL- DL and DL- DL ( Double Lock ) to EM- EM ( Employee Location) by using IMC Menu only and IMAUM menu is not used . Here you should enter the Inventories (Demand Draft / Pay Slip etc ) in to Double Lock as and when you received from your Stationary Department , otherwise Audit team will question you on this issue.

Sunday, February 17, 2013

Inventory Module in Finacle - Movement of Inventory between locations using menu options : IMAUM and IMC ,Part - I

This weekend, we will cover the Inventory Management Module in Finacle and related finacle menu options  , Before going in to details lets understand what we mean by the term  Inventory in our Banking domain . 

Cheque Books, Demand Drafts, TPO, FDR, Cash Order etc. are known as the Inventory in Banking sector . As  per  the  manual  procedure followed in Banks ,  these  forms  are  kept  in Double Lock (DL) when they are received from Stationery Department of a Bank. Before printing/issuing  such  instruments to the Customers ,  it’s  very  necessary  to  move  such  inventory from DL to the Employee location.

In  Finacle, through  Inventory  Movement  Module, these Security Forms are moved from one location to another location like from Outside location (stationary division) to Double lock (i.e. branch), from Double Lock to Employee, from Employee to another Employee.   IMC is the menu option used in  Finacle through which the inventory can be moved from one location to another location. 

The Inventory Module is  especially used for  storage, transfer  of  Security  Items  and  release  of  security  items  to  Front  Office  personnel  for  normal Banking. There are various types of inventory locations as per below:
  1. ZZ- EXT   : External to the System  i.e Stationary Department an External Location
  2. DL-DL     : Double Lock  i.e Two authorized Supervisor officials
  3. EM- User ID : Employee Code i.e Location of Tellers / Clerical Staffs alloted by   Supervisors
Location Codes
Description
Meaning

ZZ  EXT

External to the System
Inventory receive by the  branch from
Head / Administrative Office/ Stationary Deparment i.e. from
external location
DL - DL
Double Lock
It   keeps   in   double   custody  
 of   two supervisors of branch

EM- User ID

Employee Code
Supervisors    allot    or    distribute    the inventories   to   
the   front   desk   tellers for issuing to the account holders

Before movement of different Inventory , we have to assign two authorized User ID’s for transfer of Inventory from External Location  to  Branch’s  Double  Lock.  The  custodian  and  the  supervisory  official  will  put their respective user ID’s. Most often these Inventory Management functions are permitted with authorized users with higher user Class ( Officers in Banks are allowed normally for Movement of such Inventories )

Let us see the process or flow of the inventory.

For Inventory Movement Authorization 

To specify authorizers for the location classes, we have to use the menu option  IMAUM in finacle. Any changes, Addition(A) / Modification(M)  in IMAUM does not require verification by another user in finacle.

Menu Option : IMAUM

Select function to add two authorised User Id’s for transfer of Inventory from External Location  to  Branch’s  Double  Lock as show in following screen.
You can also use function M  to modify the Supervisor Officials. The  finacle menu  option  for  transfer  of  Inventory  from  one  location  to  another  (from  External  to branch’s  Double  Lock  and from  Double  Lock  to Employees)  is  done  through  Option  IMC which is illustrated next.

For Inventory Movement Between Locations  ( ZZ-EXT to DL-DL)

Menu Option : IMC

This menu option IMC is used for movement of inventory between different locations:
From ZZ-EXT to DL-DL
From DL-DL to EM- USER ID
  • Enter A for ADD, in Function field and Press F4, the 
  • cursor will appear in the next block at SOL ID & From Location field.
  • Enter your SOL ID in SOL ID field & ZZ and EXT in From Location field.  Same SOL id is to be entered in To Location SOL ID Field (as the inventory is being moved from outside of the system to Double of the system of your branch only) & Press F4 the cursor will appear in the next block at the Inventory Class/Type field  as shown below: 
  •  Enter Inventory Class like CHQ for Cheque Book, CO for Cash Order, DDS for Demand Draft, SI for Stock Invest, TDR for Term Deposit Receipt, TPO for TPOs etc.  The list of Inventory Class can be seen by press F2 which are shown as below:
   
  • The type of inventory will be automatically be selected if the class is selected from the list by pressing Shift and F4, otherwise enter the type of inventory and press Tab or Enter key to go on to the next field.
  • Alpha :  Enter Alpha Series of inventory e.g. BCZ  & press Tab or Enter key to go on to the next field.
  • Start No :  Enter Start No. of inventory e.g. the start no. is 100001.  Press Tab to go on to the next field.
  • End. No :  enter the end no. of inventory   e.g. e.g. 100100 &   press Down Arrow  Key the  system  will  automatically  display  the  quantity  which  is  being moved and the cursor will appear on the next line as shown below:   
  •  Finally, press F10 to commit and save the record and as a result , The system shall generate an Inventory Transaction No. like 162006 (as shown below). Please note this transaction no and get verified this inventory transaction by a different Employee through the menu option IMC
      

Verification of Inventory Movement:
  • Enter finacle menu option IMC, enter V for verification and press Tab to go on to Inventory Transaction No. field
  • Enter Inventory Transaction No ( Here in our example it is 162006)  and press F4 to go on to the next block.
  • Then System  shall  show  the  following  screen  displaying  the  record  of inventory to be verified.
     
  • Press F4, the system will display another screen as follows: 
    
Here, you are required to enter password of Authorized Officials who can operate Double Lock and  the authorized officials have to enter their passwords in the respective fields. On accepting password the flag of password will automatically convert to Y from N as shown above. Finally Press F10 to commit. And The system will give the message Record Verified as shown in next screen.


Next Step is to move the Inventory from the Double Lock to the Employee,  we are covering this in our next Post " Inventory Module in Finacle - Movement of Inventory between locations using finacle menu options : IMAUM and IMC ,Part - II ". 

Needless to mention , your feedback on this post are always welcome . and do not forget to mention if any errors detected by you in above steps. Do share and post your rectified steps in comments so that  precise knowledge on this subject can be shared among our bankers.

Monday, February 11, 2013

Loan account opening in Finacle through OAAC - in Detail


Dear Readers, We have already discussed the Shortcut way of Loan account opening in Finacle by following GIVSHE56 Rule, this time we will discuss the detailed procedure of account opening of Loan accounts in Finacle.

Menu option : OAAC

Go to Menu option and enter option OAAC. The following screen will appear:


Enter Customer ID & Press F11 for validating Customer’s Name
Enter appropriate Scheme Code & GL Sub-head Code Press F4. in some Banks the GL subhead  Code will be automiatically selected when you select Scheme Code and Press F4, Then following screen will appear


For every account opening of Loans in finacle,  the General, SchemeLimit DetailsInterestMIS and Repayment Schedule Details are mandatory as discussed in our previous post i.e GIVSHE56 Rule.

The above 1st Screen of General Details will appear then enter the details like mode of operation, location code, Collect Charges(Y/N) etc. Then Press F6 for next screen


The above 2nd Screen of General Details  will appear then enter the details like Passbook/ Statement ( Enter S for Pass sheet) ,  statement frequencyinterest credit a/c flag etc. The most important field in this screen is Interest Rate Code. Please choose appropriate code( defined by your Bankfor the loan account and the scheme in which you want to open the loan account. 

Press F6 for next screen.


In the above 3rd screen important fields are as follows: -
Interest Calculation Freq Dr : Please select the appropriate value.
Next Int. Calc. Date Dr: Please select the appropriate value.
Then Press F6 and will come on 1st screen. Now Press F4 for accepting General Details.
In Option field enter ‘S’ for entering Scheme Details and Press F4. Then following screen
will appear:

In the above screen of Scheme Details fill the following fields as:
Enter Loan Amount: 
Sanctioned Amount
Loan Period: Enter total months in 1st Field
Enter Credit File No.
Holder In Operative A/C For Amount Due: ‘Y’ – Yes or ‘N’ – No
Repayment Method: If above field value is ‘Y’, so Put here ‘E’, else put ‘N
Operative A/c No. above value is ‘Y’, so put appropriate SB, CA Account No.
Debt Acknowledgement Date: Enter the date of loan documents / revival letter, whichever
is later.
All other mandatory fields needs to be filled. Then Press F6 for next screen Put appropriate information as per sanction letter and Press F4 for accepting Scheme
Details.


In  Option  field  enter  ‘H’ for  entering  Sanction  and DP  (Drawing  Power)  Details  and Press F4. Then following screen will appear:


In the above screen of Sanction Details , enter  the following fields as:
Sanction / Expiry / Document / Review Date Sanction  Level  /  Authority  /  Ref.  No.  and  Security  Description.  Then  Press  F4.  Following Drawing Power Details screen will appear:
In the above screen of Drawing Power Details enter the following fields as:
Drawing Power Indicator: Enter ‘D’ Derived from Security in Case of CC Account else E
(Equal to Sanction LImit) for other Term Loans 
A/C Recalled: ‘N’ and then Press F4 for accepting DP details.

In  Option  field  enter  ‘I’  for  entering  Interest  Details  and  Press  F4.  Then  following  screen will appear:


In  Option  field  enter  ‘V’  for  entering  MIS  Details  and  Press  F4. Then following  screen will appear:


In  above screen of  MIS  select appropriate codes as defined by your Bank. After completion of  the same Press F4 for accepting MIS Details.

In  Option field enter  ‘E’ for  entering Repayment Schedule Details  and Press  F4. Then

following screen will appear:


The user can set up a repayment schedule for the loan sanctioned using this sub option.

1.  Flow  ID  field  can  have  value  which  is  EIDEM for Equated  installment demand,  PRDEM  for   Principal  demand  or  INDEM  for  Interest  demand type. 


If the account is opened under equated installment scheme then the system default populates the flow id based on the set up done at scheme level. If it is equated instalment, system populates the EI amount based on the number of instalments indicated and the user can over ride it. An exception is also associated with this for doing necessary validations

2.  Start  date  of  the  installment  should  always  be  greater than the account

open date
3.  User has to enter the number of installments to arrive at the installment amount
4.  Depending upon the parameter set at product level, user can enter the values for the field  “number of installments”, and “amount”.
5.  Interest  demand  date  should  be  the  next  month  end  date  when  the  next
interest application will take place in the account.

If the user is coming in modify mode, then the original repayment schedule can
be modified. The system does a validations if the number of installments 

Press F4 for accepting Repayment Schedule Details.

Then lastly enter option to enter Loan document detail and Charges related to Processing of the Loan. Press F4  enter DSA / Loan Reference details as defined by your Bank and enter the Employee/ Loan Reference ID , Then Press F4


Now Press F10 for commit. 


Then Account No. will be generated by system.


Verification of Account Opening of Loan

Menu Option : OAACAU
  • Enter Generated A/c No. in Temporary A/c No. Field and Press F4 . 
    For visiting all screens of General Details Press F11 continuously.

  • After coming on 1st Screen Press F4 for accepting General Details Enter option ‘S’ for verifying Scheme Details and press F4 , Press F11 for visiting next screen of Scheme Details Verify details and Press F4.
  • Enter option ‘H’ and press F4 for verifying Sanction and DP Details First, Sanction Details will appear. Verify and accept with Pressing F4. Then, DP Details will appear. Verify and accept with Pressing F4.
  • Enter option ‘I’ and press F4 for verifying Interest Details After appearing Interest Details verify and Press F4 for accepting the same.
  • Enter option ‘V’ and press F4 for verifying MIS Details After appearing MIS Details verify and Press F4 for accepting the same.
  • Enter option ‘E’ and press F4 for verifying Repayment Schedule Details After  appearing  Repayment  Schedule  Details  verify  and  Press  F4  for  accepting  the same. 
Press F10 to commit. The account number will be displayed. and the Loan Account will be Verified.


Wednesday, February 6, 2013

Opening Loan Account in Finacle - GIVSHE56 RULE in Shortcut

Dear readers, we have already discussed the procedure of account opening in finacle especially for Savings(SB)/ Current Account (CD). If you are working in Credit / Advance Department in Bank , then you often come across account Opening process related to Various Loan accounts such as Term Loan , Personal Loan or education loan . We would like to present Posts related to the same.

As usual, we would like to present first the Short Cut way of Account Opening for Loans and in our next posts we will cover in details with screen shots.

While we open account for Loans we will follow GIVSHE56 rule in which we have to enter details in the mandatory options as below:

G - GENERAL DETAILS
I - INTEREST DETAILS
V - MIS CODES
S - SCHEME DETAILS
H - LIMIT /SANCTION DETAILS
E - REPAYMENT SCHEDULE
5 - DOCUMENT DETAIL
6 - DSA DETAIL

Opening the Loan Account  ( Web Mode )

Menu : OAAC 

Pres f4 - customer Id - f4 - f2 - in scheme type give LAA - f4 - select the scheme code - shift f4 -f4 - mode of operation - f4 - S - f4 - N - f4 - C - f4

Delete G Put S - f4 - loan amount - tab - Loan period - f4 - Operative Account - f4

Delete S put H - f4 -f4 -Sanction date - expiry date - f4 - document date -f4 -sanction level - tab - sanction by - tab - sanction ref no - f4 - Security details - f4 - E - f4 - N - f4

Delete H put I - f4 - f4

Delete I put V - f4 - Enter the MIS codes - f4

Delete V put 5 -  Enter the Document details - f4

Delete 5 put E -f4 -Enter the Repayment Schedule details - f4

Delete E , put 6 - Enter DSA details (Reference ID for the account ) - f4

Delete E put A- Down arrow - enter the joint names/Guarantor/Co-obbligants details-f4-f10

Verification of Loan A/c Opening ( Web Mode )
Menu : OAACAU 
Enter - V - f4  - give the temp ID - f4 - f4 - delete G put S - f4 - f4 - delete S put H - f4 - f4 - f4 -Delete H put I - f4 -f4 - delete I put V - f4 - f4 - delete V put 5 - f4 - f4 - delete 5 put E - f4 - f4 - delete E put A - f4  -delete A put 6 - f4  f4 - f10 

ONS MENU

Opening of Loan Accounts in ONS Menu ( HOAACLA )

Menu : HOAACLA 
Give the Customer ID > Click on Tree Icon > Click Submit > Select the Scheme Code > Click Accept

General Details Tab
Select the A/c Statement > Specify the Statement Frequency > Dispatch Mode > Next Print Date and Mode of Operation and click Validate

A/c Interest Tab
Click Validate

Scheme Tab
Give the Loan Amount and Loan Period > Give the Operative A/c > click validate

Visit the LA Interest Tab

Flow Parameters Tab
Give the No of Installments and Validate 

Flow Details Tab
Click on Amortization Schedule button for viewing the Repayment Schedule details, you can even take a print.

(You can add the Joint Names / Guarantors Details in Related Party Details )

MIS Codes
Fill up all the necessary Fields and click Validate

A/c Limit Tab
Enter the Sanction Date > Expiry Date > Sanction Authority > Document Date > Sanction Level > Limit Reference No > Drawing Power Indicator and Click Validate.

You can enter the PDC or Documents Details in their respective Tabs and

Finally Click Submit

Verification of the Loan Account 
Menu : HOAACVLA

Function Verify > Give the Temp ID No > Click Accept > Visit all the relevant Tabs and Finally click Submit.

Posts Category wise :

      CBS Manual – Finacle Menus/ Commands for your ready reference


·         Huge Collection of 938 Finacle Menus

·         286 Selective Finacle Menu options

·         Category wise Commonly used Finacle Menus

·         Finacle Menu options/ Commands for Bank Auditors

·         Frequently used Function keys in Finacle


      Customer ID & Account Opening related Menu Options / Commands


·         Customer ID creation and Verification in Finacle by using CUMM menu

·         Customer ID creation in finacle in short by using CUMM menu

·         Changing Customer ID of a Customer

·         Account Opening (Savings/Current) in Finacle using menu option OAAC

·         Account opening in Finacle – in short

·         Frequently asked questions related to Customer ID  and Account Opening


      Demand Draft / Pay Order related Menu Options / Commands


·         Issuing a Demand Draft using Finacle Menu options TM

·         Issuing Multiple Demand Draft / PO using Finacle menu option TM

·         Printing Demand Draft / PO using menu option DDPRNT

·         Cancellation of Demand Draft  in Finacle using menu option DDC

·         Marking a Demand Draft Lost and issuing Duplicate DD

·         Inquiry and Reports finacle Menu related to Demand Draft


      Miscellaneous Finacle Menu Options / Commands


·         Standing Instruction Maintenance using Finacle Menu Options SIM.

·         Creating a Memo Pad in Finacle Part - I.

·         Creating a Memo Pad in Finacle Part - II.

·         Deleting Memo Pad in Finacle

·         Mass Transaction Posting in Finacle using Finacle Menu option TTUM.

·         Freezing & Unfreezing of accounts in finacle using Finacle Menu AFSM

·         Passbook Printing in Finacle

·         Finacle Teller Cash account Maintenance using Finacle Menu GECM

·         Finacle Menu option TM  for Transaction Posting and Maintenance